Tuesday, 5 March 2013

Wet Bags


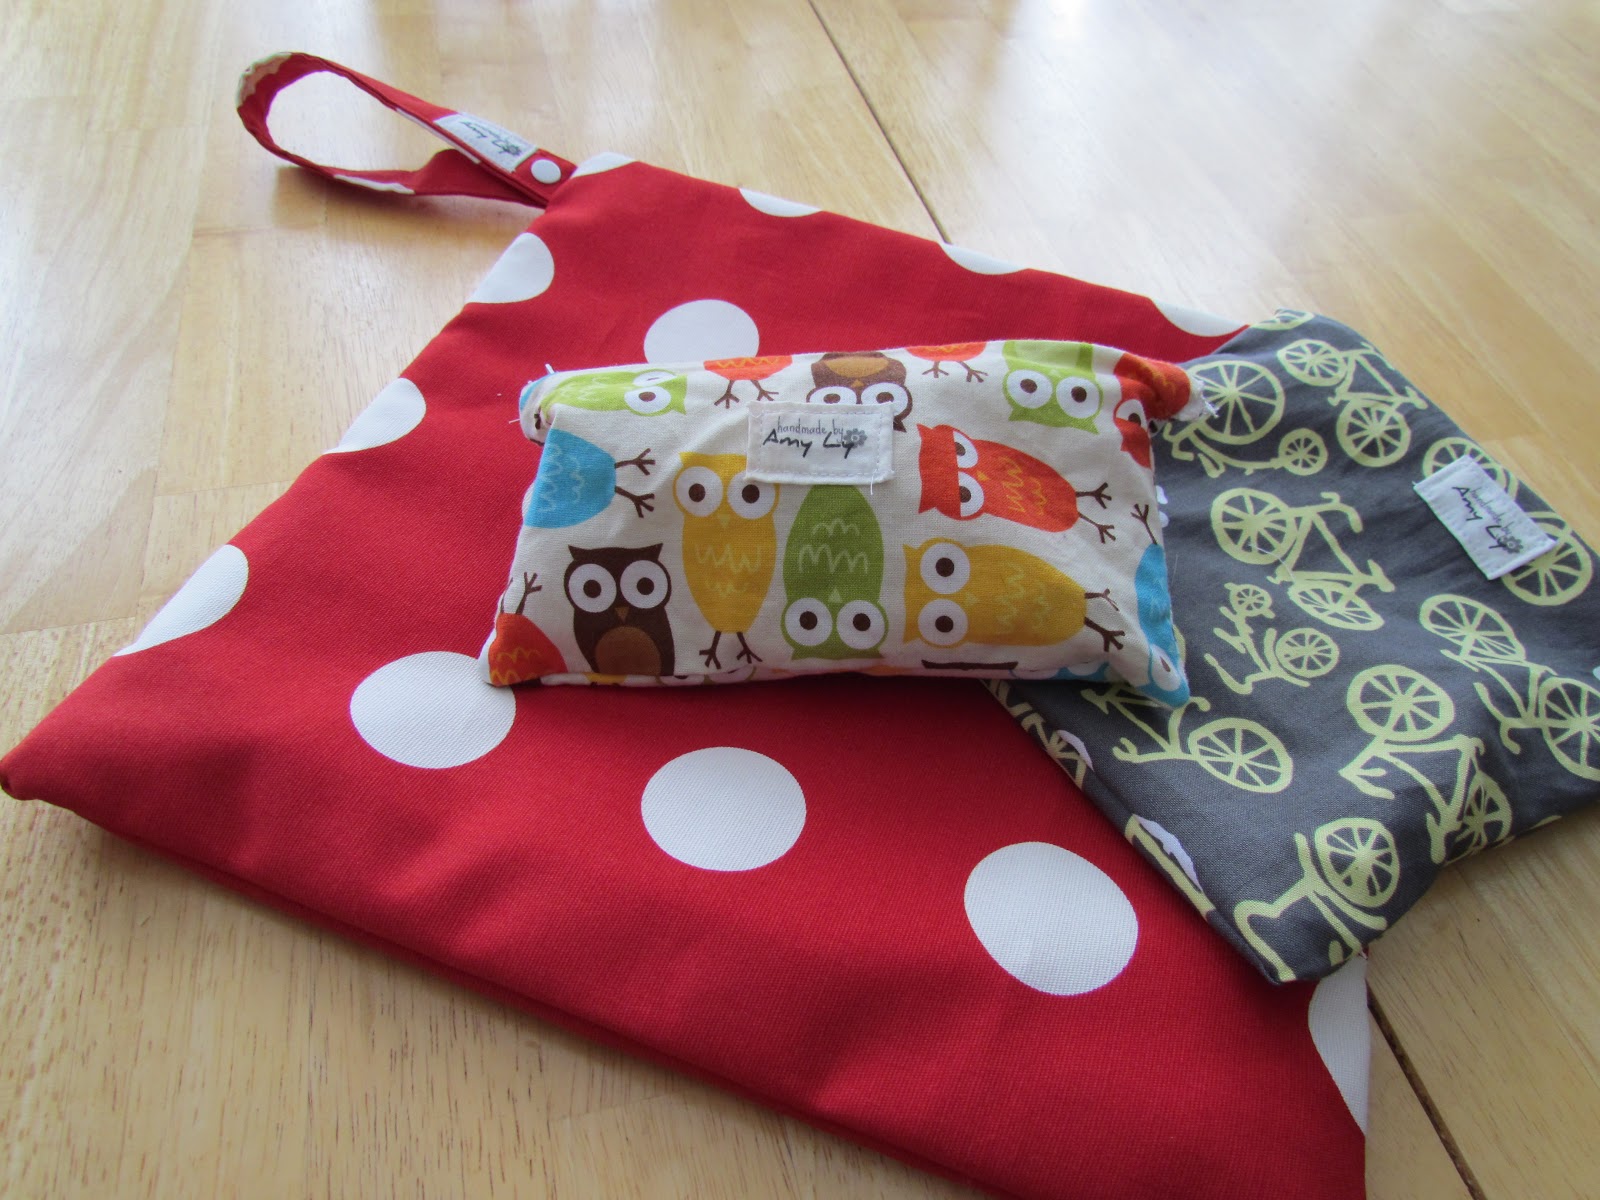
One project I have been super excited about, because they have so many uses and are so functional... wet bags! 


We originally started using wet bags for outings with our little guy in cloth diapers.  This allowed us to go out and about with cloth diapers and not worry about transporting the soiled wet cloth diapers.  However, I am discovering there are many other uses for these handy waterproof bags.  I recently made one for a friend of mine who needed something to carry her swimsuit in so the rest of her items in her bag would stay dry.  These bags would also be great for travelling to carry your bath products (in case you are like me and worry about shampoo and conditioner leaking all over your clothes in your suitcase!).  They also make great cosmetic bags.

 
12"x12" size


The wet bags I have been making are made with a PUL (polyurethane laminate) fabric liner, a water-resistant material.  The outside of the bag is made with a heavier cotton fabric so it's more durable.

7"x7" size


Since the PUL fabric I ordered is CPSIA compliant, lead free, and BPA free, I also made two re-usable snackbags with some lighter cotton fun prints.  The bag above (with the bicycle print) is a sandwhich bag size, and the bag below is a snack bag size.

7"x4" size

However, since the time I first ordered PUL material, there has been some debate over whether PUL is actually food-safe.  It is very difficult to find proof that PUL is harmful to food, and I can see there can be a lot of more research into this subject.  One company from the states who makes a large amount of reuseable snack bags (who I'm sure when I first did my research, claimed to use a PUL lining), now does not disclose the type of fabric they use in their wet bags and snackbags.  All they will say about their lining is "it's FDA approved, CPSIA compliant, BPA free and lead free".  I am not convinced PUL is not food-safe, yet I am going to look into this further.  I am in the process of looking into a couple other lining alternatives.  I think I will continue to do my research and dedicate another post soley to snackbags once I come to better conclusions.

Back to wet bags... The larger wet bags have a carry handle that can also snap onto strollers or backpacks.


I also made an EXTRA LARGE wetbag for travelling purposes which we use for cloth diapers when we are away from home.  (This would also make a great laundry bag)

17"x26" size
 
Wet bags are a great green alternative to plastic bags, and can be re-used over and over again.  I recommend washing them on delicate so the colors of the outside fabric stay fresh, and line dry as the PUL shouldn't go in the dryer.

You can now order wet bags available in the SHOP, or order a custom made wet bag with one of the following prints by emailing amysragstostitches@gmail.com.
 
 
12"x16" size


Sunday, 24 February 2013

DIY baby legwarmers


If you've used baby legwarmers before, you know that diaper changes are quick and easy, and they are just so cute! They also work well on cold winter days as an extra layer for baby's legs. Our little guy still wears them as he scoots around the house. For a little girl, they can double as footless tights underneath a dress too.

With a new baby on the way, I thought it might be fun to make some legwarmers for a newborn. I also made Affam a couple more pairs while I was at it. I found socks on clearance at Superstore, so I gave this a try.


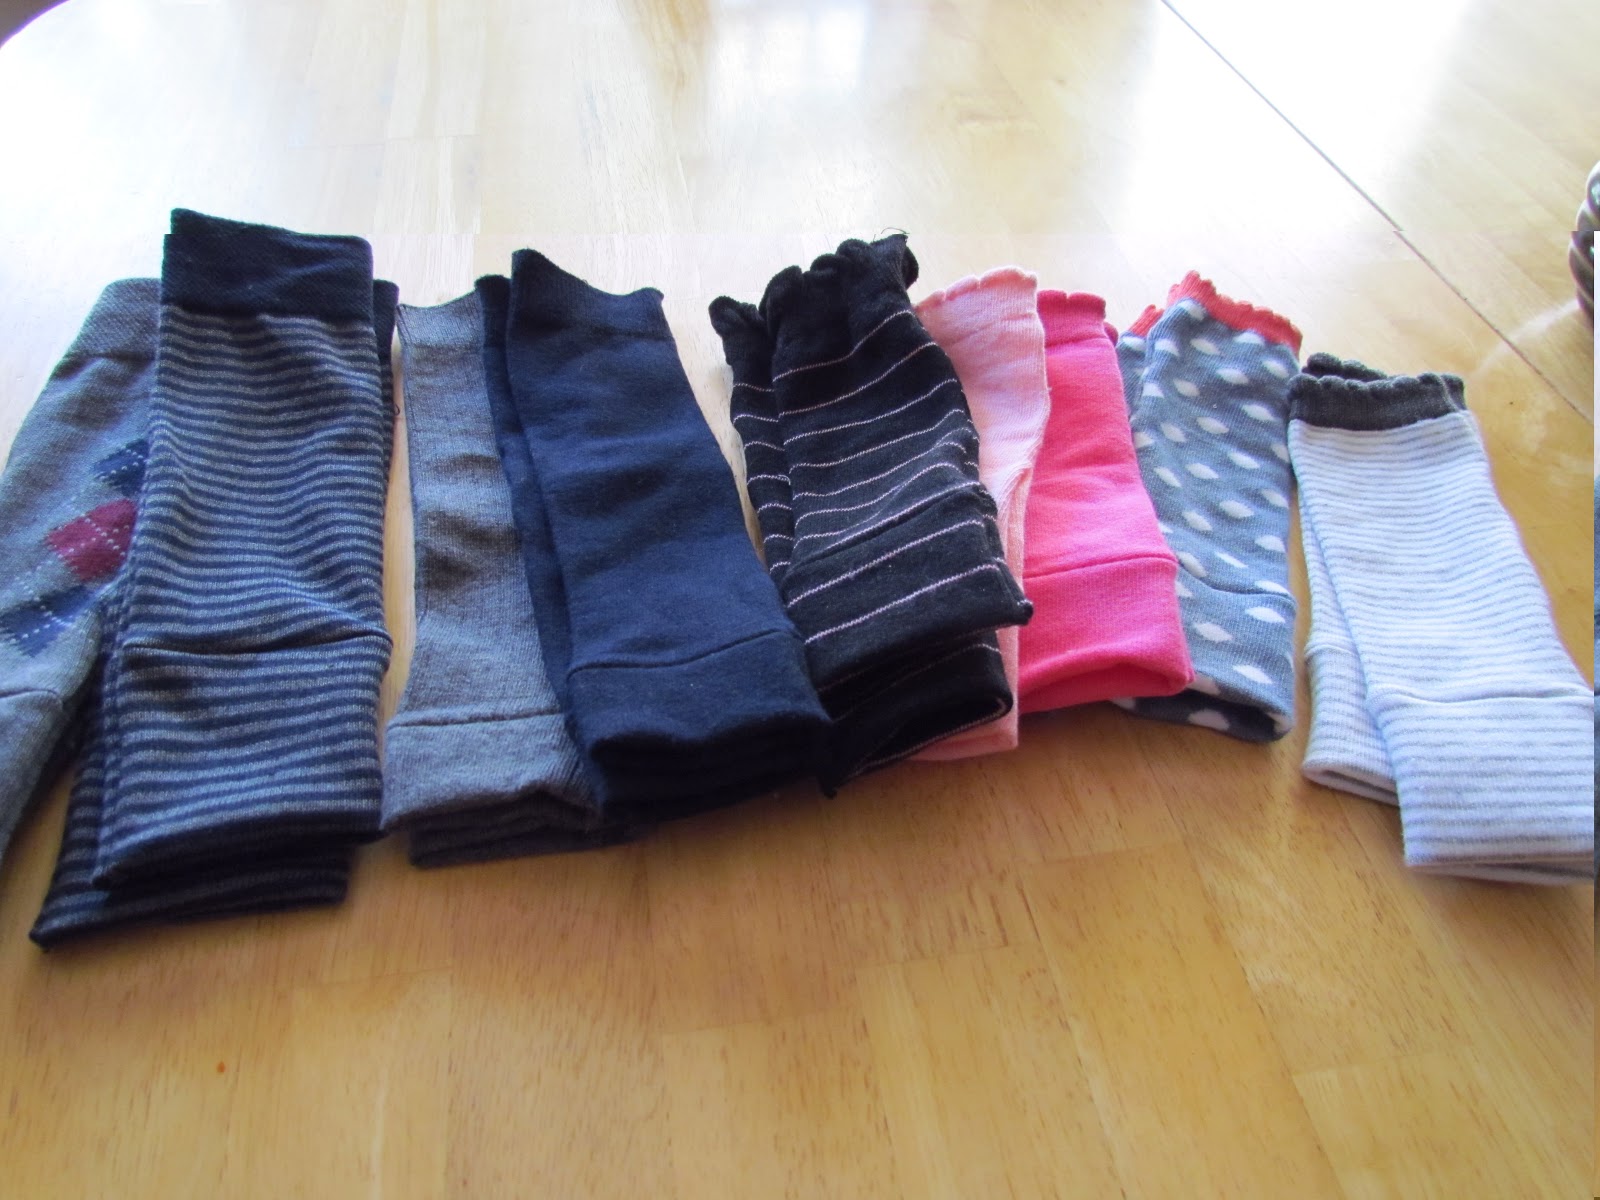
The finished product:
The left two are made from men's socks, making them big enough for Affam.  The ones on the right are made from girl's socks and they were shorter for a newborn.  The middle two (grey and navy) are made from girl's kneehigh socks, so they are a bit longer for a newborn (and also gender neutral).
  These were actually very quick and easy to make.  If you are interested in making these yourself, you can follow the DIY tutorial found on My Sister's Suitcase blog.  The only modification I made was to make the newborn size smaller.  I made the socks skinnier by cutting off 1/4" from the width and then sewed the seam up the side as my last step.

These would be super cute on a little girl!

OR... these would be cute for a boy!  We are keeping the gender of our new baby a surprise... so don't get any ideas!
My little model, awake and happy from his nap (it was very hard getting him to hold still, and I just noticed our dog, Molly, is in every picture!):


Perfect for our little scooter and playtime around the house!


Thursday, 26 January 2012

Lovin' the gDiapers!

We have been using cloth diapers since our little guy arrived home... and we have to say it's been a great investment!  They're easy to use and we feel good about the fact that we leave less waste behind.  Plus, they're super cute!  Friends of ours gave us our first pair of gDiapers to try... and after doing some research we decided we were going to give cloth diapers the best shot possible.


We ordered a shipment from gdiapers (at the time they only had a US distribution warehouse), so the shipping was a bit expensive... but we ordered everything we needed.  There is now a Canadian distribution warehouse, so Canadians can order from gdiapers.ca.  We've also found some gdiapers at London Drugs too!  If you're just starting out and want to cloth diaper from the beginning, this is what I suggest you will need:
  • 6 gpants in each size (small, medium, and large) - 18 total 
  • 24 gCloth inserts in each size (small and med/large) - 48 total (The small gCloth fit the tiny and small gpants, and the med/large gCloth fit the medium and large gpants).  This will give you enough inserts so you're not doing laundry everyday.  We usually do a load every 3 days or so.
  • 10 tiny gpants (the newborn size) - since our little one was so small, we actually got a lot of use out of this size.  This size goes up to 10lbs.
We found the most economical way to purchase all that we needed (brand new) was to buy a gBaby Bundle, a sweet Bundle (size medium), a sweet Bundle (size large), and 4 extra packs of gCloths (size small).  This will also give you 2 packages of the biodegradable flushable liners to try as well.  Many people are also selling gently used gpants online if you wanted to hunt those down.  Gdiapers has a facebook page which has a re-sale forum where you can buy and sell used g's as well.

If you love gdiapers as much as we do, you'll also want to sign up to be a gmum or gdad so you can receive goodies, info and coupons in the mail to share with your friends.

We've learned getting the right fit is the most important thing you can do to guard against leaks.  As long as baby is in the right size gPant... we really haven't had many issues with leaks.  We've also adapted to doubling up on gCloth at nighttime (using a small liner underneath our medium liner - hemp sides together) to last through the night.


You can also enter to win some free g's at Oh Baby! Magazine.  They are doing a giveaway for Canadians.  Contest closes February 10, 2012.  Good luck!

To learn more, go to gdiapers.com.


Tuesday, 17 January 2012

Super Big Swaddling Blanket


From the time Affam was born, he has loved being swaddled when he goes to sleep.  However, the receiving blankets are too small to do this anymore.  So, I bought some flannel fabric and made him an extra large one.  I of course had to add a cute print to the blanket to make it our own!

Affam trying out his new swaddler
 I cut the flannel to roughly a meter squared, and added a 4" strip of scrap printed fabric about a third of the way across the blanket.  I top stitched the printed fabric with a half inch hem folded underneath and pressed.  Then I did an overcasting stitch along the edge of the whole blanket to prevent the flannel from fraying.  Since I got the flannel fabric on sale for $4 a meter, and used scrap fabric for the rest, this project works out to about $4!

examining the finished product

I think Affam loves it!

Monday, 16 January 2012

The last 8 months... BABY and life as a mom!

It has been so long since I've blogged, I'd better update you on the last 8 months!  My last blog was a few days before our baby was born, and I don't know where the time has gone.

Our little boy, Affam Kai, joined us on May 13, 2011 at 6 lbs 3 oz.  Affam was born at 37 weeks (3 weeks early), so it was a bit of a surprise when I went into labor in the wee hours of the morning and delivered at 8:41am.  We are so in love with our little Affam, and I don't think I'll ever forget the moment I became a mom!

A few hours after delivery I experienced some life threatening trauma but we are grateful to say I made it through this close call.  If I left this part out of Affam's birth story, it would be difficult to describe how thankful we are to be together as a family today.  God has truly been good to us!


We are so excited witnessing every change in Affam, and watching him grow.  He is so much fun, very easy going, and such a happy boy!


What a life change we have had this year... but one we wouldn't give up for anything!  We are so blessed!


Sunday, 8 May 2011

Rice Bag Hot Pack


I thought I may find a hot pack useful for achy muscles and pains in the coming weeks with Baby's arrival quickly approaching.  This bag is filled with rice, and only takes 2 minutes in the microwave to warm.
 I found a tutorial online showing how to make a rice bag foot warmer: http://www.vanessachristenson.com/2009/02/tutorialrice-bag-feet-warmer.html.  I like how this bag has a slipcover because you can remove it and throw it in the wash.  This project was quick and easy, and would be a thrifty gift!

Wednesday, 4 May 2011

Fancy Burp Rags


I just finished a project I'm really excited about!  I made some fancy burp rags for Baby. 
I got this idea from another blogger, Kate, at http://seekatesew.blogspot.com/2010/11/bucket-o-burpees.html.  She shows how to make a "Bucket-o-Burpees", which would make a great baby gift!

I used the Kushies brand of flat washable diapers for the white flannel.  They come in a pack of 6 for $15.99 at Sears.  I was able to cut them each in half, so that would make 12 burp cloths.  If you use scrap fabric for the remainder of the project, the burp rags work out to roughly $1.30 each.

If you are looking for more instruction on how to make these, you can check out Kate's blog at the link above for a step by step tutorial.

I owe my mom a big thank you because she serged all the edges for me on these burp cloths... which made this project super easy!

This has been one of my favorite projects so far! 

Tuesday, 3 May 2011

Girls LOVE flowers!

Wouldn't you agree that girls love to accessorize?  Lots of babies and girls wear headbands with big flowers on them, and they look super cute!  So, I thought this could be a very affordable gift to make for my 6 month old niece.

I found some artificial flowers at the dollar store and pulled them all apart.  I threw away the stems and all the plastic pieces so all that remained were the fabric flowers.  I think I may also make good use of these flowers on homemade cards.. a less expensive alternative to what you might find in a scrapbooking store.

I found some soft headbands at Walmart - 6 for $4 (sized for little girls).  The flowers I got were $1 per bouquet (I bought a few different colors so I could have a collection for future projects).  So this ended up being a very inexpensive project.

I arranged the flower petals and sewed them onto the headbands.  Easy!!  I also of course had to add my own label to the headband.


 I can't wait to see my niece modeling her new flower accessory!  How cute!!